Linux dd Command Show Progress Copy Bar With Status

Linux dd Command Show Progress Copy Bar With Status
by Vivek Gite on October 20, 2012 last updated August 18, 2016
I am using dd command for block level copy and just found out that there’s no built in way to check the progress. How do I use the Linux or Unix dd command while coping /dev/sda to /deb/sdb and display a progress bar when data goes through a pipe? How do I monitor the progress of dd on Linux?
You need to use the pv command which allows you to see the progress of data through a pipeline. You need to install pv command as described here. Once installed, type the following commands to see the status bar. Please note that if standard input is not a file and no size was given with the -s option, the progress bar cannot indicate how close to completion the transfer is, so it will just move left and right to indicate that data is moving. It will also show average MB/s rate:
Examples: Use pv command monitor the progress of dd
WARNING! These examples may crash your computer and may result into data loss if not executed with care.
Copy /dev/sda to to /dev/sdb:
pv -tpreb /dev/sda | dd of=/dev/sdb bs=64M |
OR
pv -tpreb /dev/sda | dd of=/dev/sdb bs=4096 conv=notrunc,noerror |
Sample outputs:
Fig.01: pv and dd in action
You can create a progress bar and display using the dialog command as follows:
(pv -n /dev/sda | dd of=/dev/sdb bs=128M conv=notrunc,noerror) 2>&1 | dialog --gauge "Running dd command (cloning), please wait..." 10 70 0 |
Sample outputs:
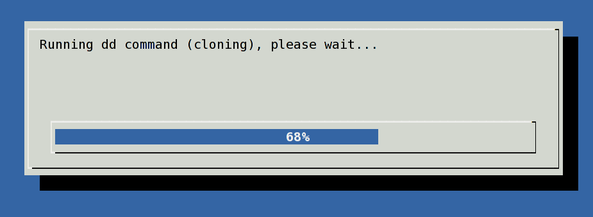
Fig.02: Show the Status of dd Command in progress using pv and dialog command
Examples: Use gnu dd command from coreutils version 8.24 or above only
Pass the progress option to see periodic transfer statistics using GNU dd command:
# dd if=/dev/sda of=/dev/sdb bs=1024k status=progress
Here is another example from my Mac OS X/MacOS:
$ sudo gdd if=ZeroShell-3.6.0-USB.img of=/dev/disk5 bs=1024k status=progress
Sample outputs:

Fig.03: GNU dd displaying progress