Install Loganalyzer Docker help Management Remote Linux Server rsyslog
Prepare Proxmox VE LXC with Debian 13 template for run docker containter
After the Debian startup to disable kernel logger monitor in rsyslog.conf
edit /etc/rsyslog.conf to disable kernel log collection
#module(load="imklog") # provides kernel logging support
Prepare MySQL/Mariadb database appliance for rsyslog output
Install Mariadb server
sudo apt update
sudo apt install mariadb-server
sudo mariadb-secure-installation
NOTE: RUNNING ALL PARTS OF THIS SCRIPT IS RECOMMENDED FOR ALL MariaDB
SERVERS IN PRODUCTION USE! PLEASE READ EACH STEP CAREFULLY!
In order to log into MariaDB to secure it, we'll need the current
password for the root user. If you've just installed MariaDB, and
you haven't set the root password yet, the password is blank,
so you should just press enter here.
Enter current password for root (enter for none):
OK, successfully used password, moving on...
Setting the root password ensures that nobody can log into the MariaDB
root user without the proper authorisation.
You already have a root password set, so you can safely answer 'n'.
Change the root password? [Y/n] Y
... skipping.
By default, a MariaDB installation has an anonymous user, allowing anyone
to log into MariaDB without having to have a user account created for
them. This is intended only for testing, and to make the installation
go a bit smoother. You should remove them before moving into a
production environment.
Remove anonymous users? [Y/n] y
... Success!
Normally, root should only be allowed to connect from 'localhost'. This
ensures that someone cannot guess at the root password from the network.
Disallow root login remotely? [Y/n] n
... Success!
By default, MariaDB comes with a database named 'test' that anyone can
access. This is also intended only for testing, and should be removed
before moving into a production environment.
Remove test database and access to it? [Y/n] y
Dropping test database...
... Success!
Removing privileges on test database...
... Success!
Reloading the privilege tables will ensure that all changes made so far
will take effect immediately.
Reload privilege tables now? [Y/n] y
... Success!
Cleaning up...
All done! If you've completed all of the above steps, your MariaDB
installation should now be secure.
Thanks for using MariaDB!
New install rsyslog-mysql package for enable rsyslog output to database
apt install rsyslog-mysql
依檔案內容建立相關的資料庫表格,建立完成後,接下來說明rsyslog伺服器的組態檔(/etc/rsyslog.conf)的設定說明,如下表所示。
rsyslog組態檔設定說明
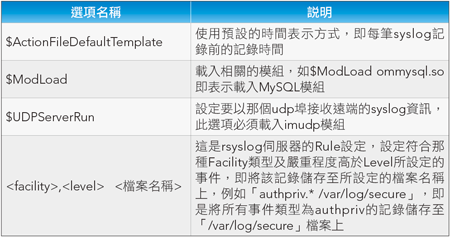
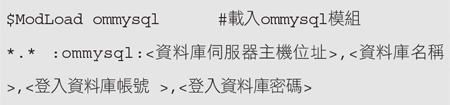
接下來設定rsyslog.conf,為rsyslog伺服器加上MySQL功能,在「/etc/rsyslog.conf」組態檔中加入以下幾行設定,如下圖所示:
# /etc/rsyslog.d/mysql.conf
### Configuration file for rsyslog-mysql
### Changes are preserved

module (load="ommysql")
*.* action(type="ommysql" server="localhost" db="Syslog" uid="rsyslog" pwd="sangbe01")
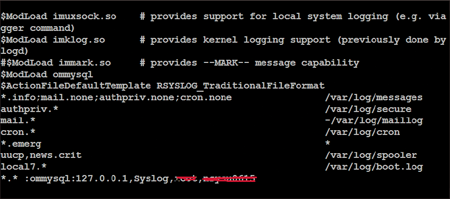 |
| ▲在「/etc/rsyslog.conf」組態檔內加入兩行設定。 |
本例是將所有產生的Log記錄置入位於本機的MySQL資料庫中,而名稱為syslog的資料庫。
在設定完成後,systemctl restart rsyslog 來啟動rsyslog伺服器,如果一切正常,此時syslog的記錄資訊應該會即時地匯入資料庫中,如下圖所示。
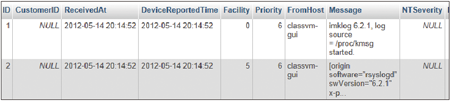 |
| ▲syslog記錄資訊即時地匯入資料庫內。 |
Install LogAnalyzer with docker compose
version: "3.8"

services:
  webapp:
    image: vsc55/loganalyzer:latest
    container_name: LogAnalyzer
    restart: always
    ports:
      - "80:80"
    environment:
      - TZ=Asia/Taipei
      - HTTP_PORT=80
    volumes:
      - ./data:/data
      - ./logs:/var/log
首先,在「/etc/docker/loganalyzer/data/」目錄下新增config.php。

Start up docker compose file
docker compose up -d
接著,利用瀏覽器執行「http://install.php」安裝程式進行安裝,步驟如下:
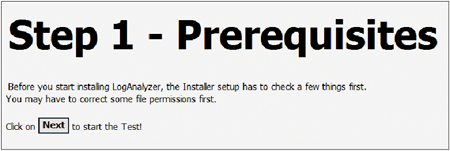
STEP 1:只是提示字串,提醒使用者。
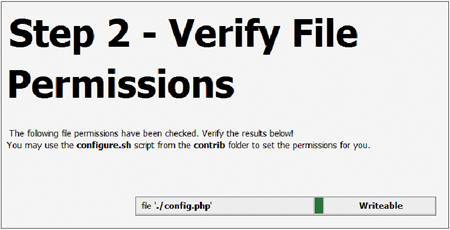
STEP 2:驗證config.php檔案的權限,此檔案必須可讀寫。在設定完成之後,會將相關的設定檔寫入此檔案中。
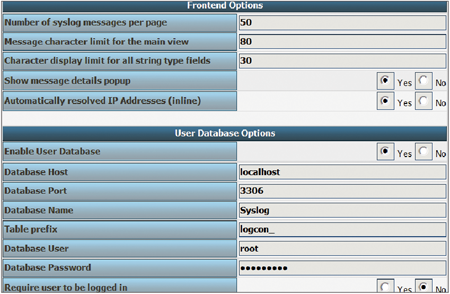
STEP 3:設定頁面顯示的格式(如每頁顯示幾行等等),這裡要輸入資料庫的相關資訊,本例的資料庫名稱為Syslog,輸入帳號、密碼以及新建資料庫的表格(table)。
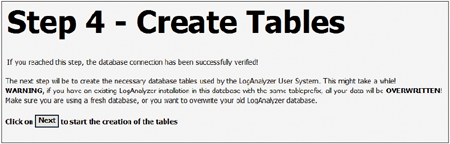
STEP 4:在資料庫內新建表格。
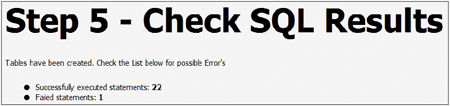
STEP 5:檢查資料庫的設定過程中是否正常。
Setup UDP protocol input in rsyslog server
# /etc/rsyslog.d/10-remote.conf
# Load the input module for UDP (uncomment if using UDP)
module(load="imudp")
# input(type="imudp" port="514" ruleset="remote" Address="172.22.2.132")
input(type="imudp" port="514" Address="172.22.2.132")
}
Setup UDP protocol output in rsyslog client
#/etc/rsyslog.d/10-forward.conf
# Forward all messages via UDP to the server
action(
    type="omfwd"
    target="172.22.2.132"   # replace with server hostname or IP
    port="514"
    protocol="udp"
)